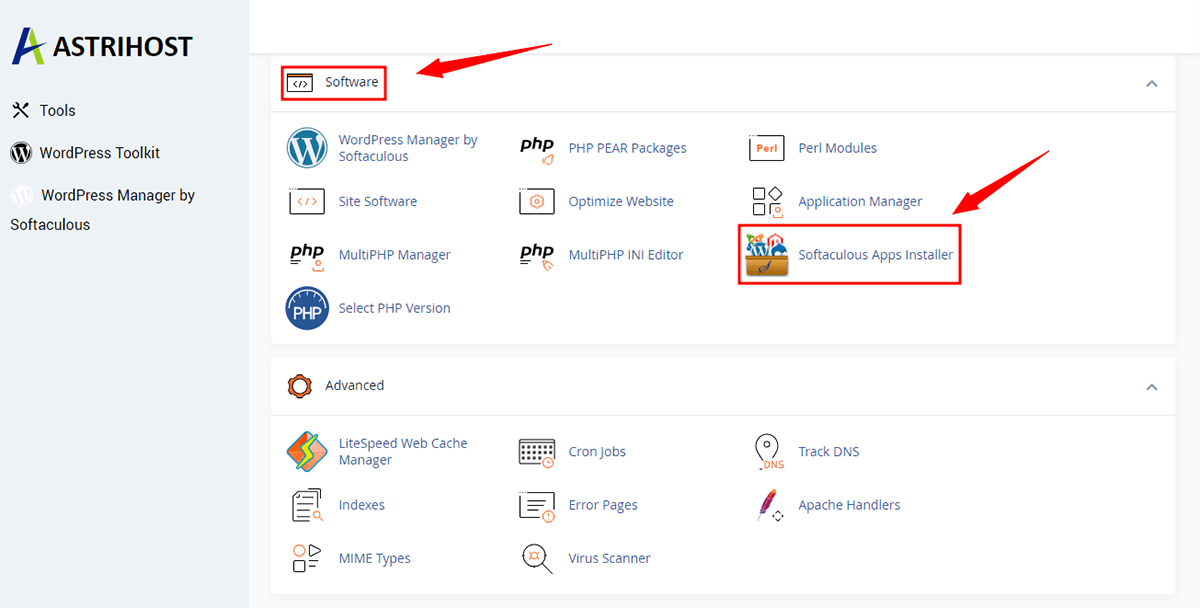
Log into your cPanel account.
- Scroll down to the Software section and click on the Softaculous App Installer icon.
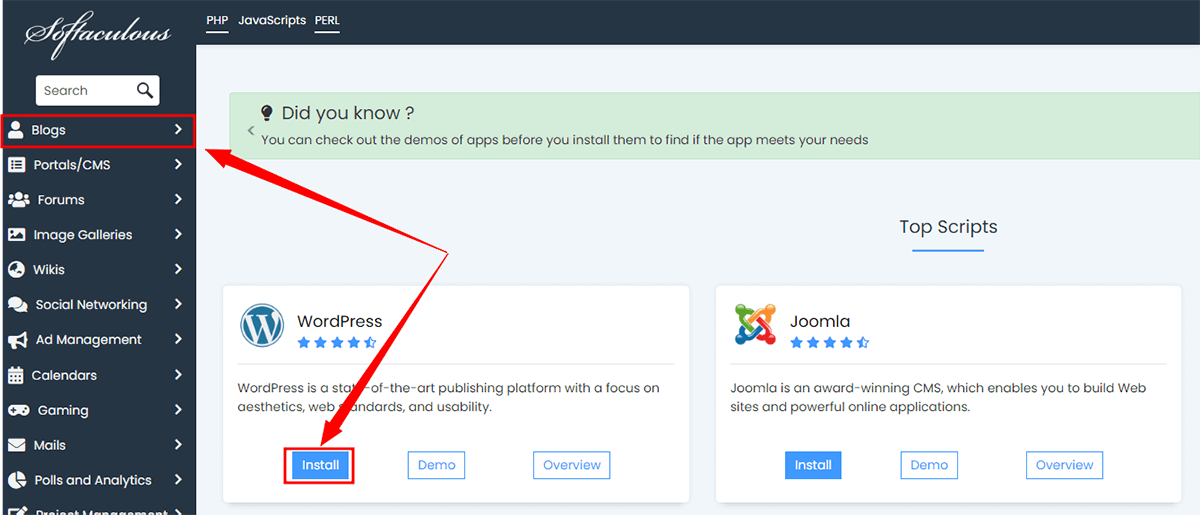
cPanel will redirect you to the Softaculous Panel.
- Find WordPress in the list of scripts, then click on the Install
You can also find it by clicking Blogs in the menu on the left side of your screen, and then clicking on the WordPress Link.
- Click on the Install button
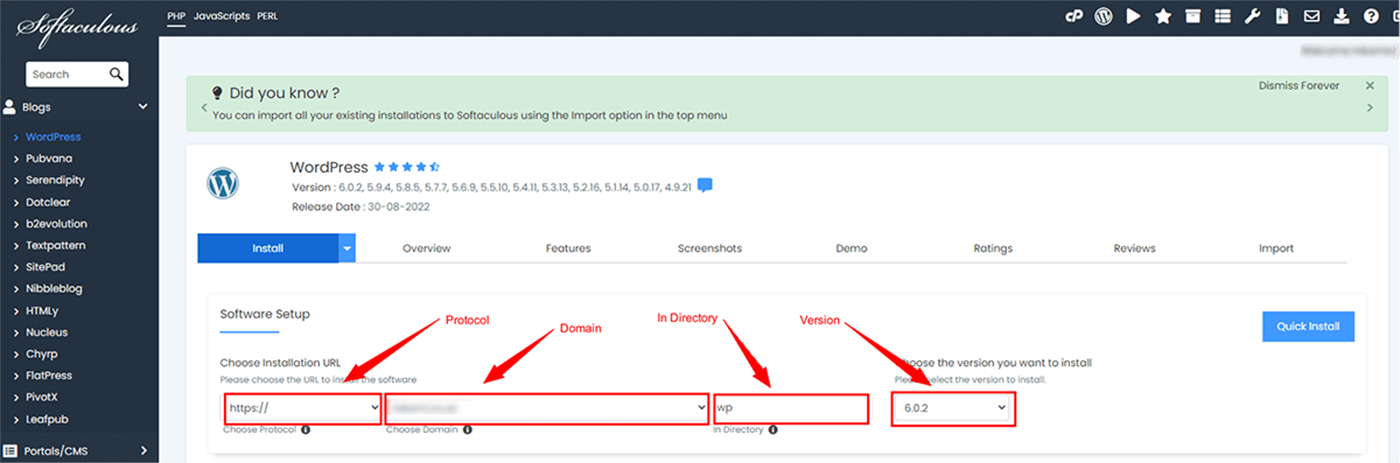
Fill the necessary fields under the Software Setup field:
- Choose the version you want to install: We suggest you use the default version.
- Choose Installation Protocol: HTTPS:// is recommended.
- Choose Installation URL: Choose the appropriate domain.
- In Directory field: Should you want to install this in a directory, i.e. yourdomain.com/directory, enter the directory name. Otherwise, leave it blank to install in your main domain, i.e. example.com
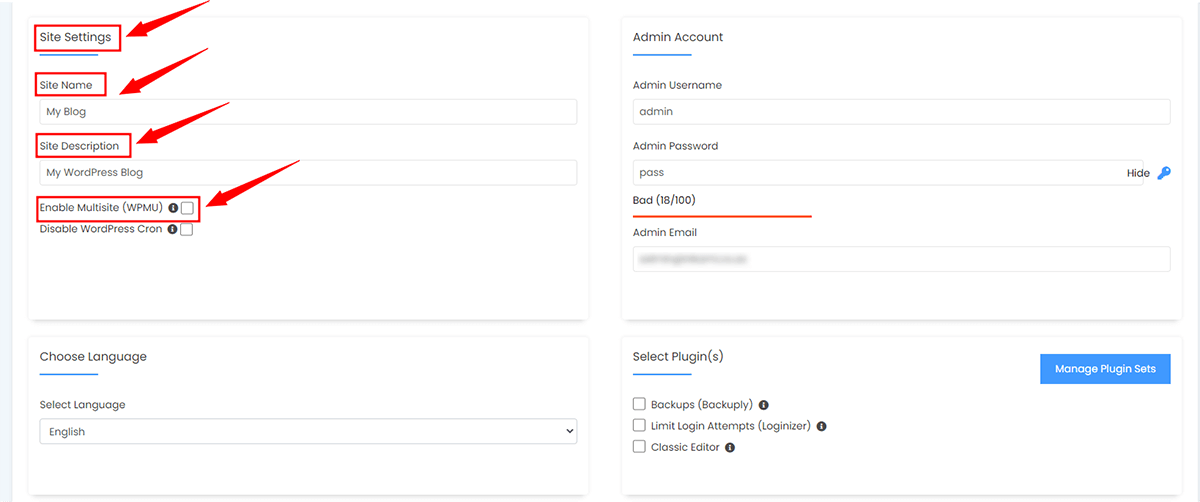
Under the Site Settings field, enter the following information:
- Site Name: Enter the name of your website, such as My Website.
- Site Description: Your site description.
- Enable Multisite (WPMU): You need not change this.
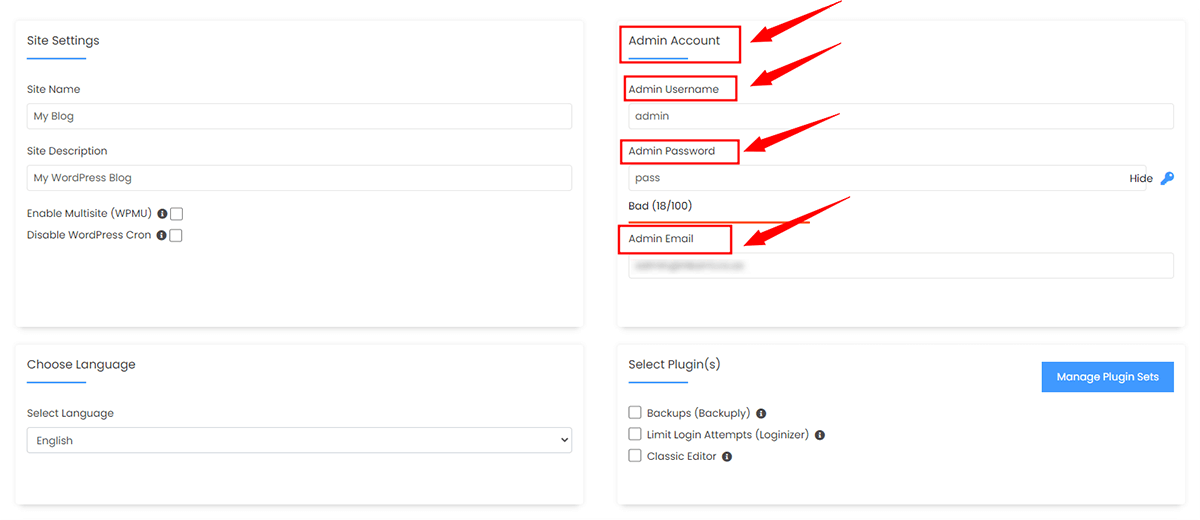
Under the Admin Account field, enter the following information:
- Admin Username: Your new WordPress username (for security reason do not use the Administrator or the Admin username.
- Admin Password: Use a strong password.
- Admin Email: Your e-mail address.
Note: Copy the admin username and password on a notepad because you will need these login details to access the admin area of your WordPress blog later.
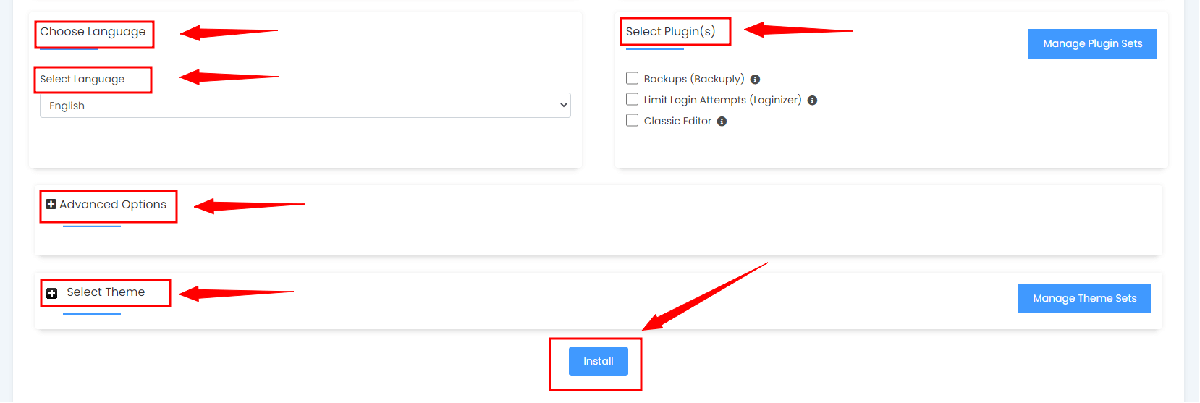
- Choose Language: You can choose the language of your WordPress blog. The default language of WordPress is English.
Select Plugin(s): You can skip this or select the plugins you wish to install.
- Advanced Options: We suggest not changing these options.
- Select Theme: You can select any available theme. If you do not want to do this, leave it as it is, and WordPress will use its default theme.
- Lastly, scroll down to the end of the page and click the Install button.